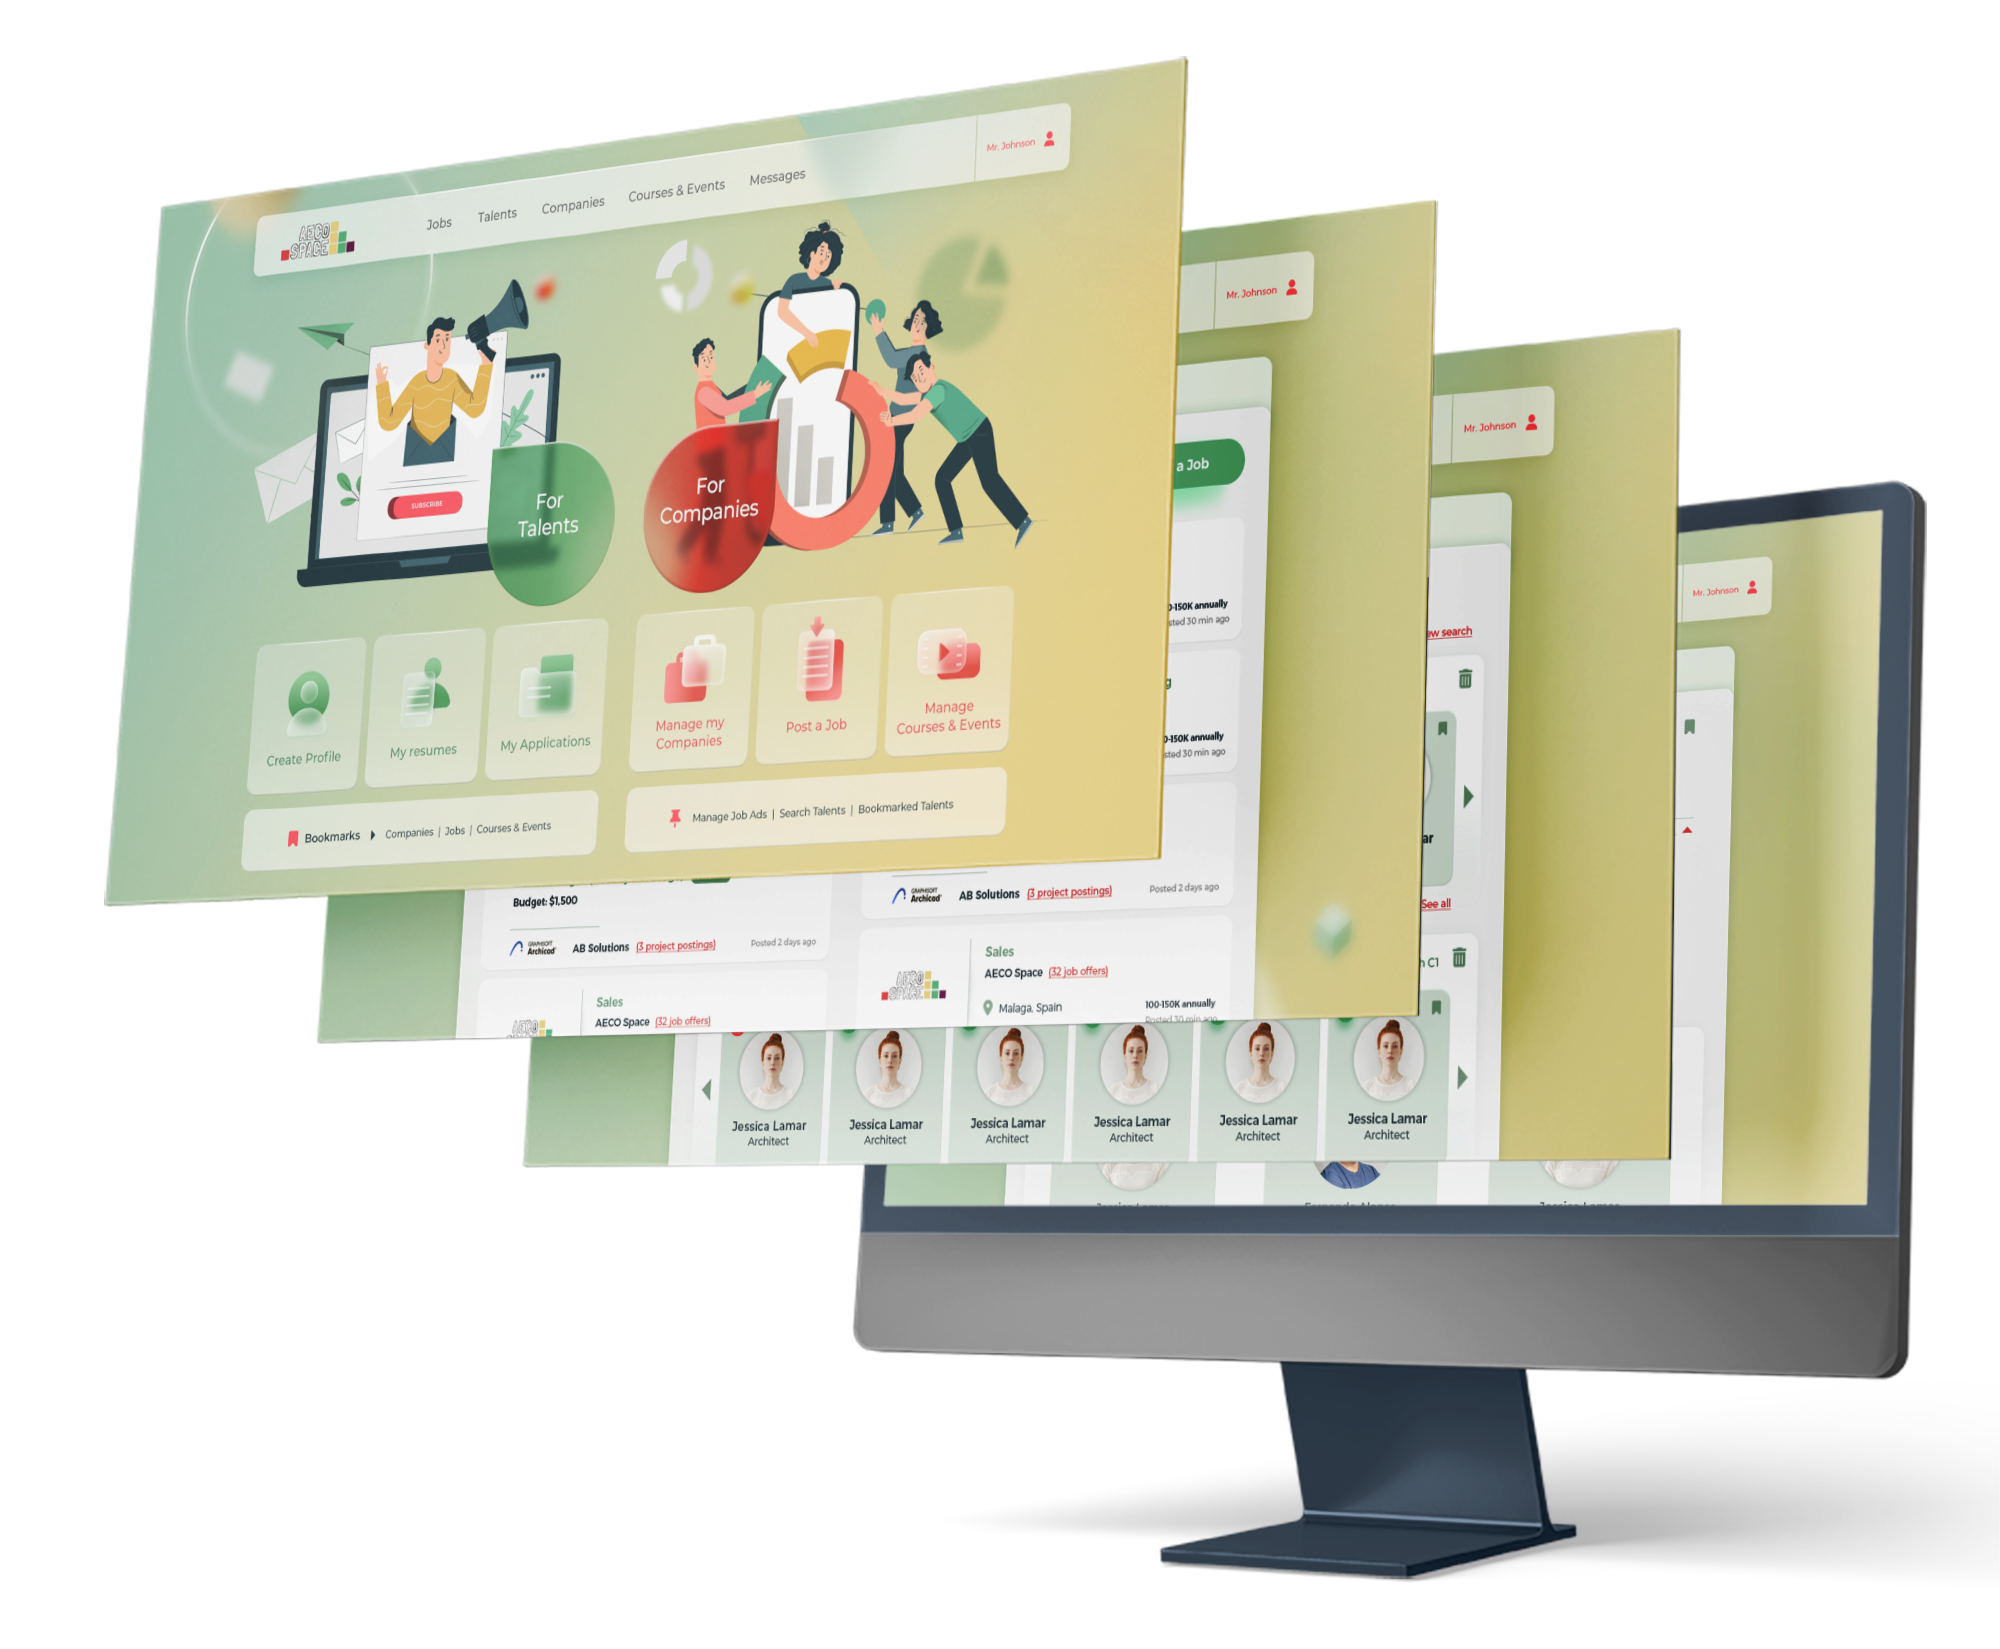
A REVOLUTIONARY NEW PLATFORM FOR AEC PROFESSIONALS
Live now
A new home for everyone in the AEC space to network, find projects and promote services.

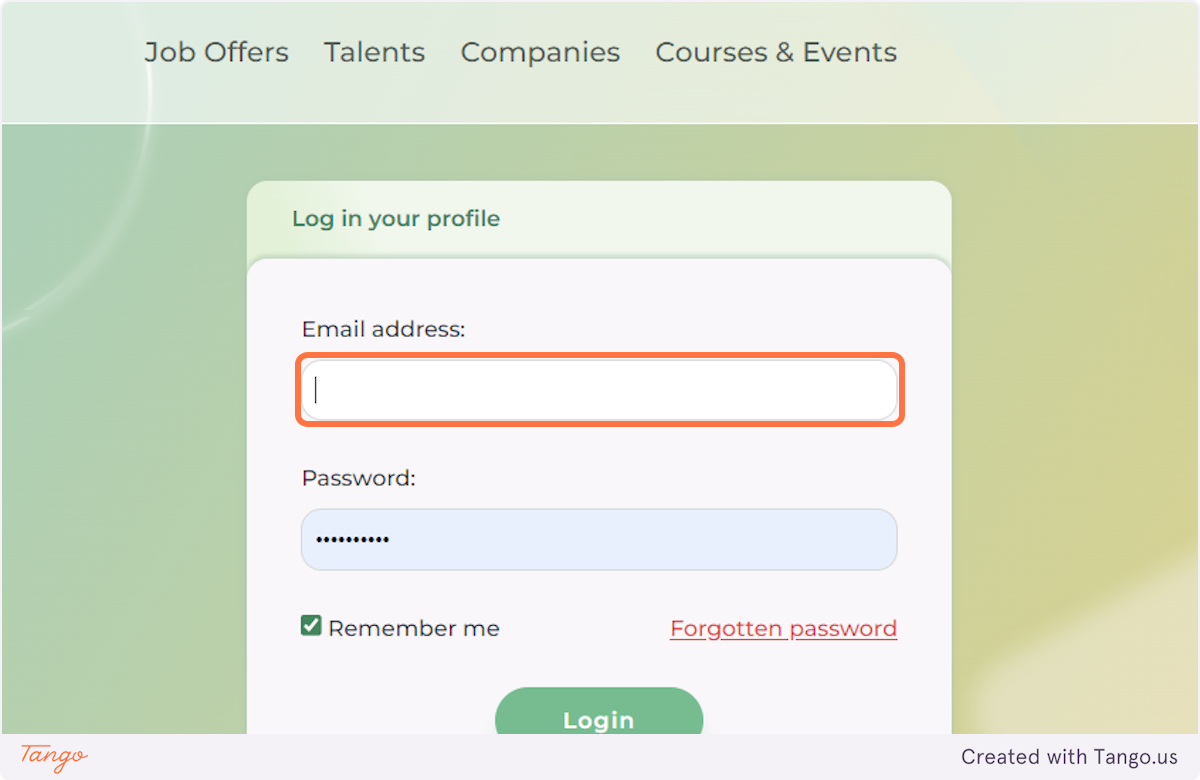
1. Login to the AECO Space Platform
Go to https://aecospace.com/login and sign in with your profile. If you don't have a profile yet, you can easily create one through the Register link.
2. You will be automatically redirected to your home page dashboard.
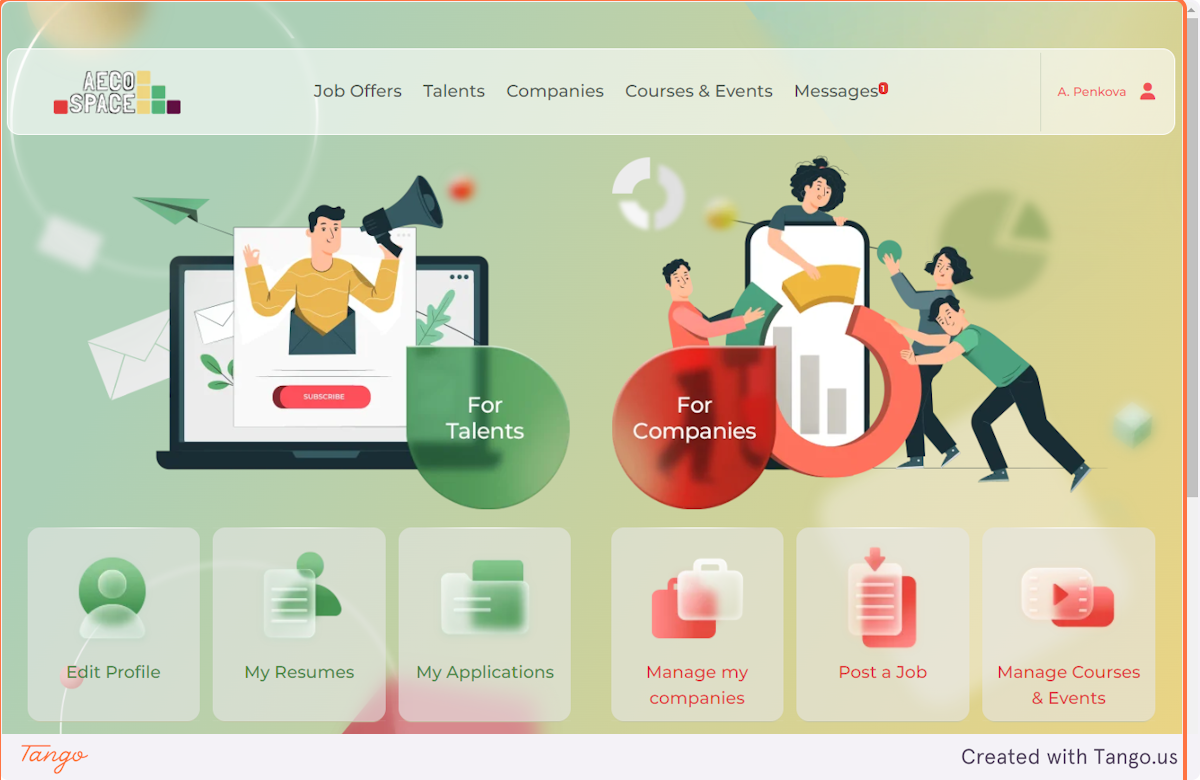
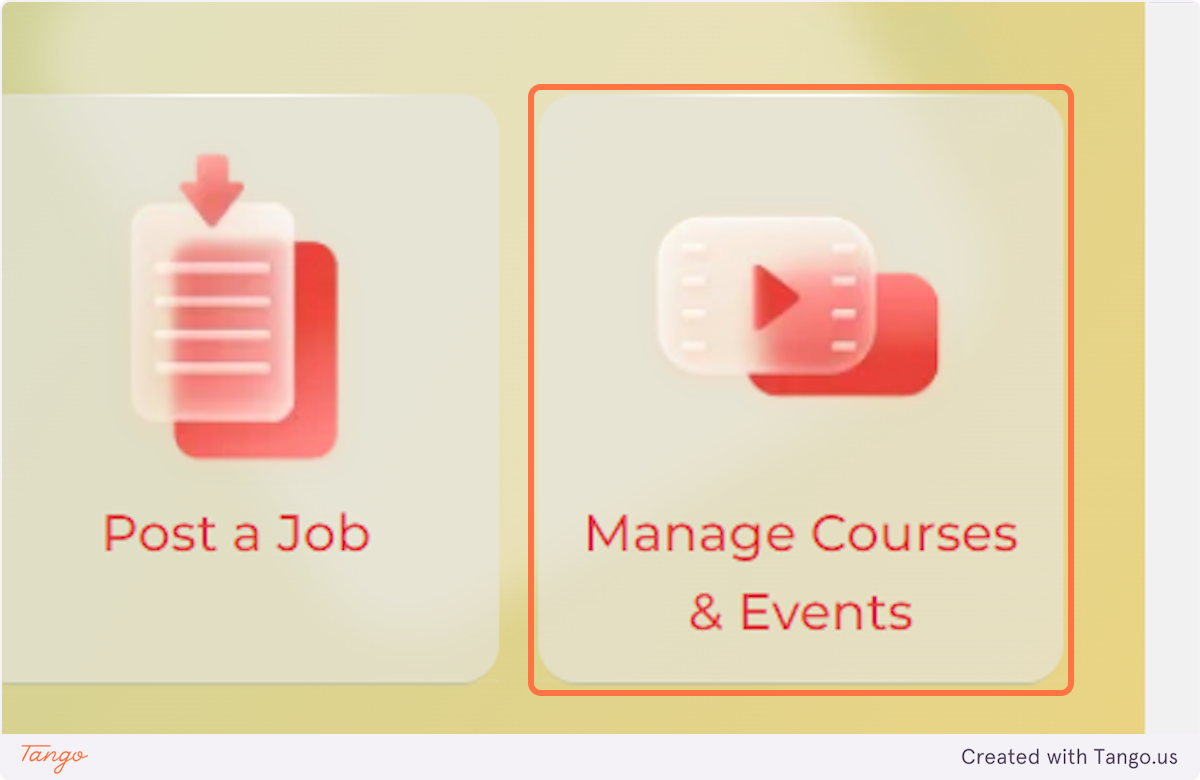
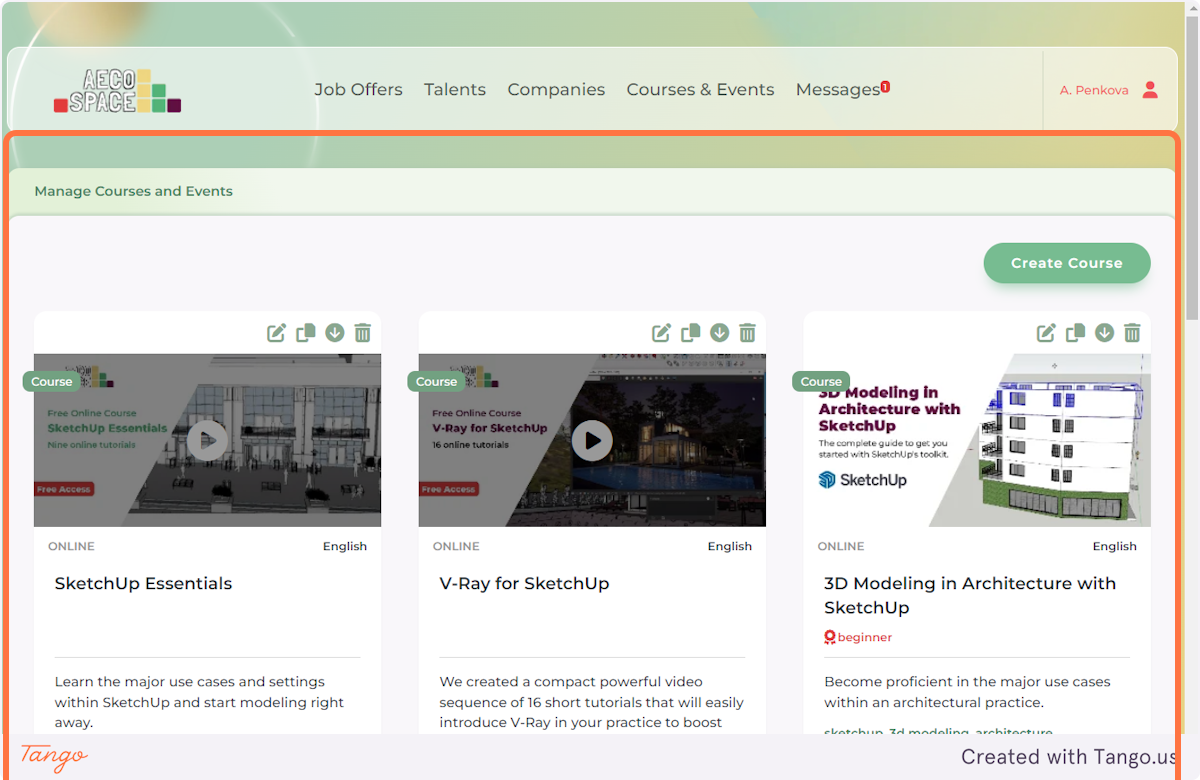
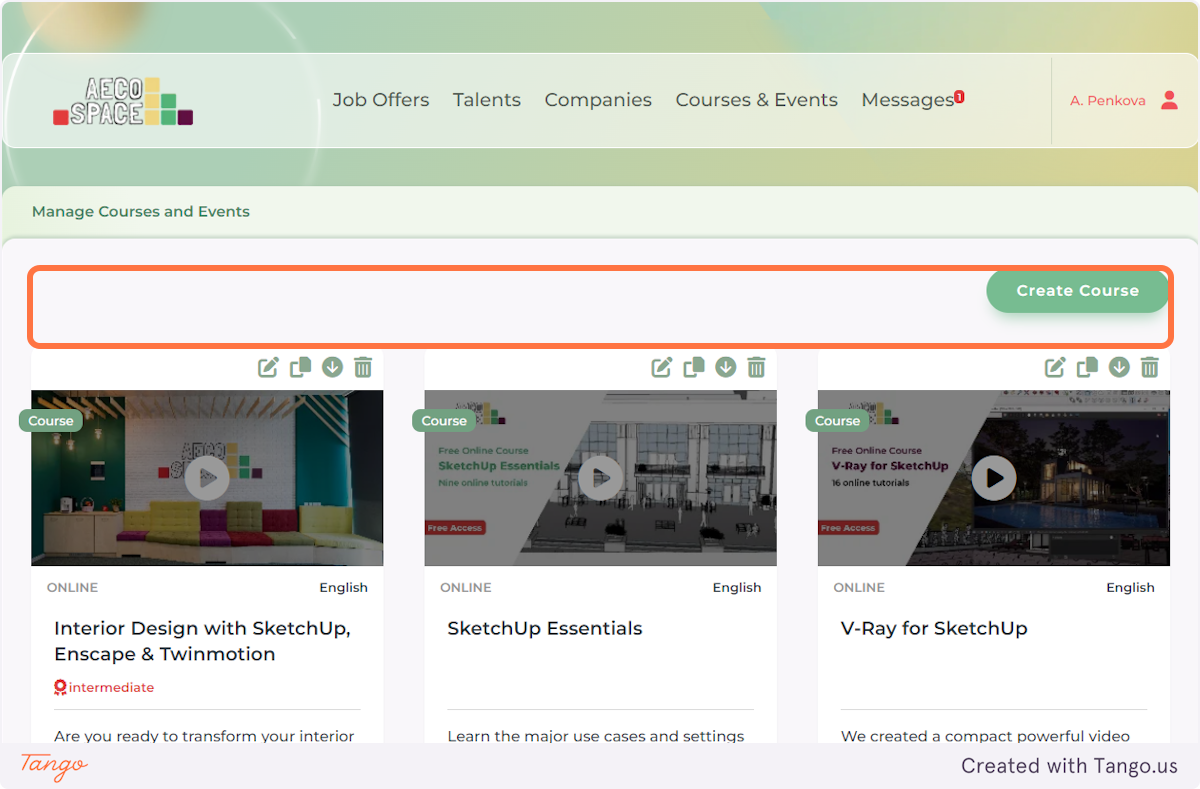
3. Click on MANAGE COURSES & EVENTS at the bottom right corner of the page.
4. You will see your Personal Events Page where all your courses are hosted.
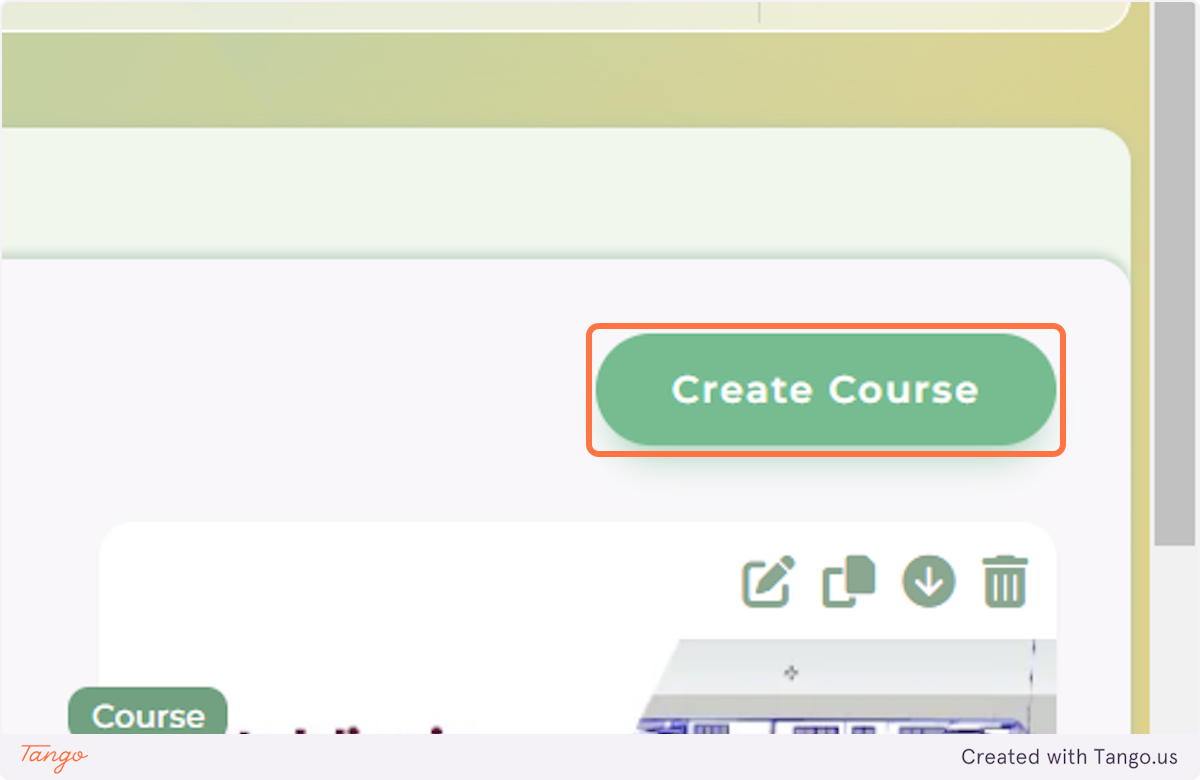
5. Click on Create Course.
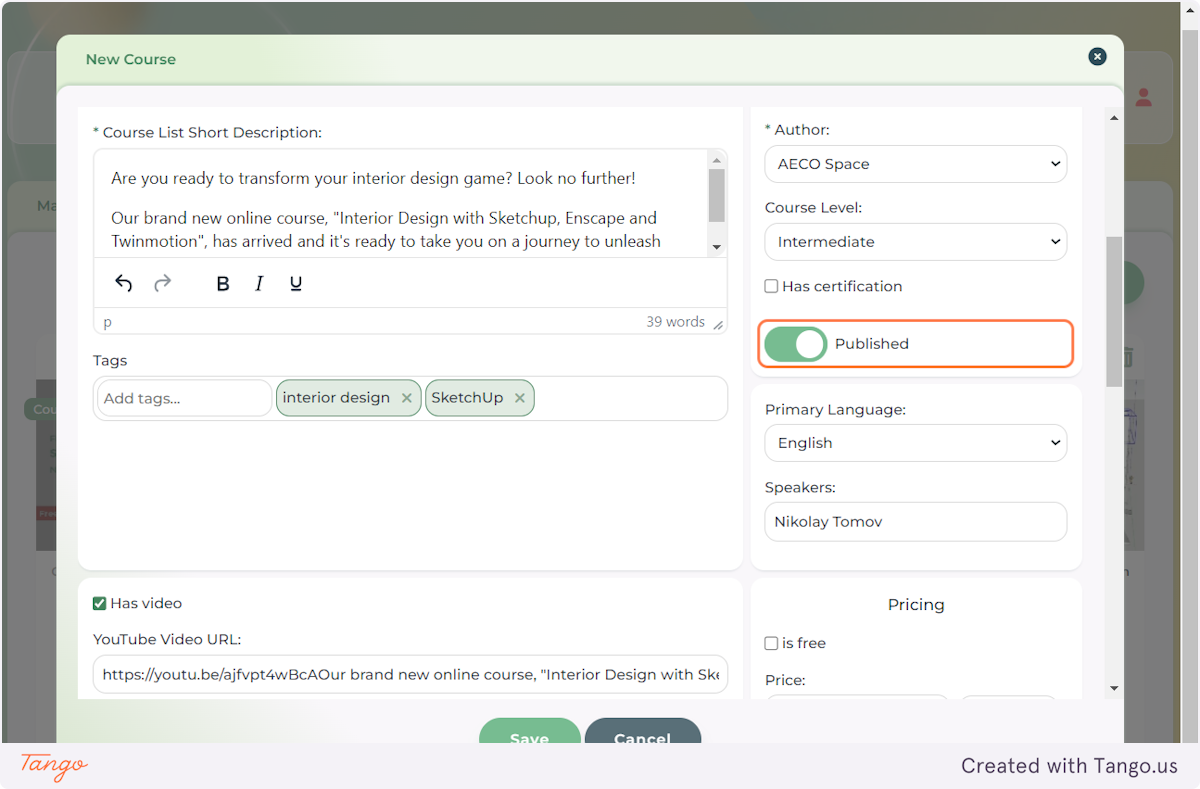
6. You will be redirected to an Event Creation page.
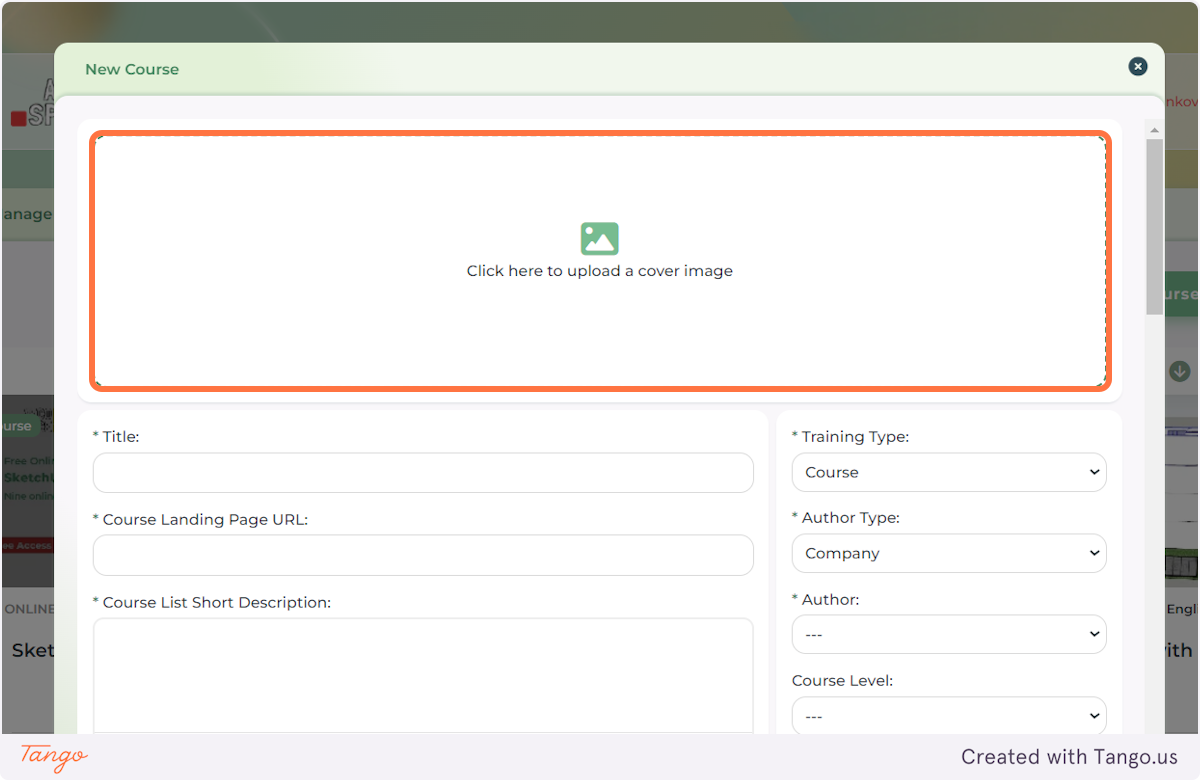
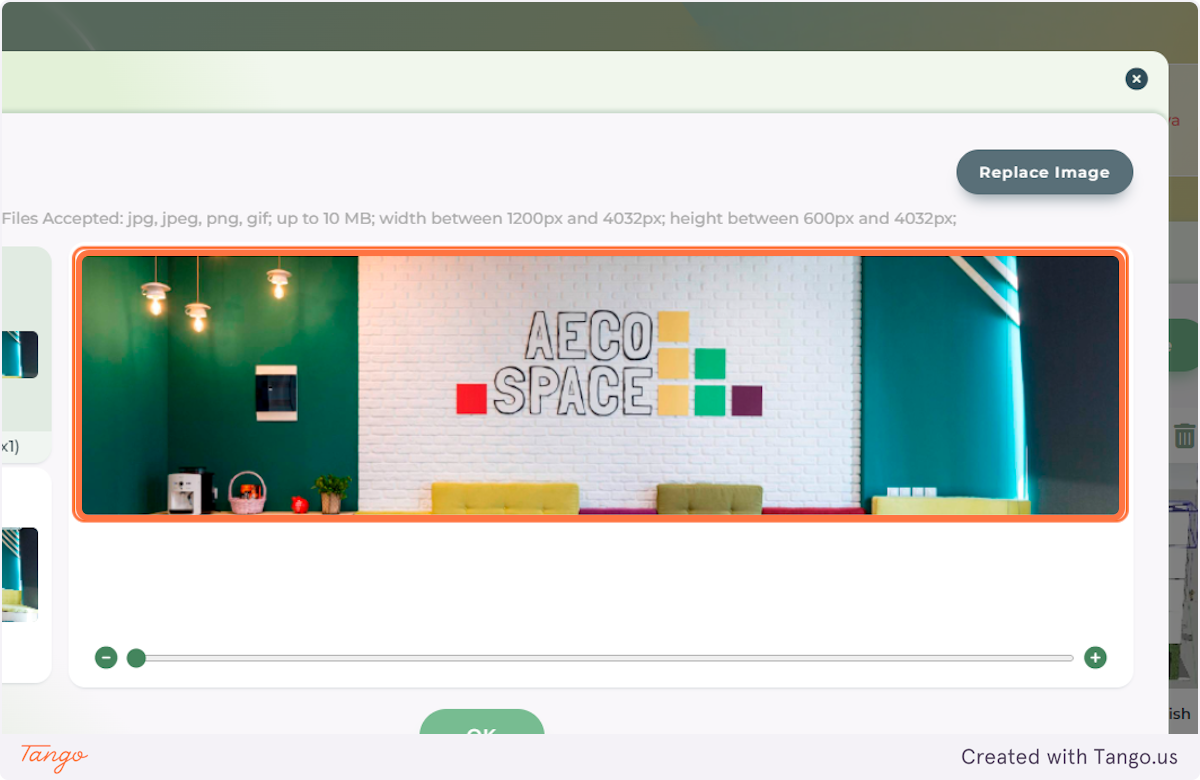
7. Select a Cover Image for your event. This image will be displayed as a thumbnail on the Courses & Events Directory and as a cover image on your course landing page.
Files accepted: jpeg, png, gif up to 10 MB; width between 1200 px and 4032 px; height between 600 px and 4032 px.
Click on SAVE to save your work.
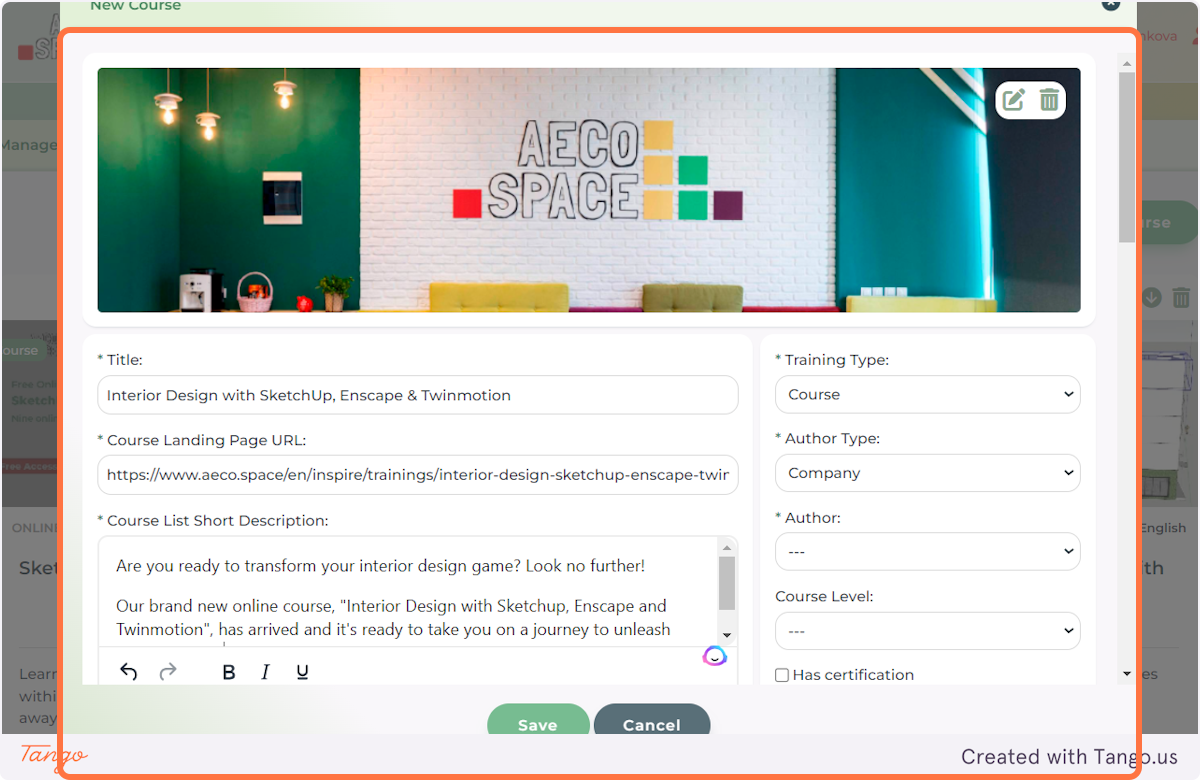
8. Next: add the main details of your Course or Event. The fields marked with an asterisk are mandatory.
The Course Short Description field should contain a brief description of the event that will be displayed on the Course Directory Page.
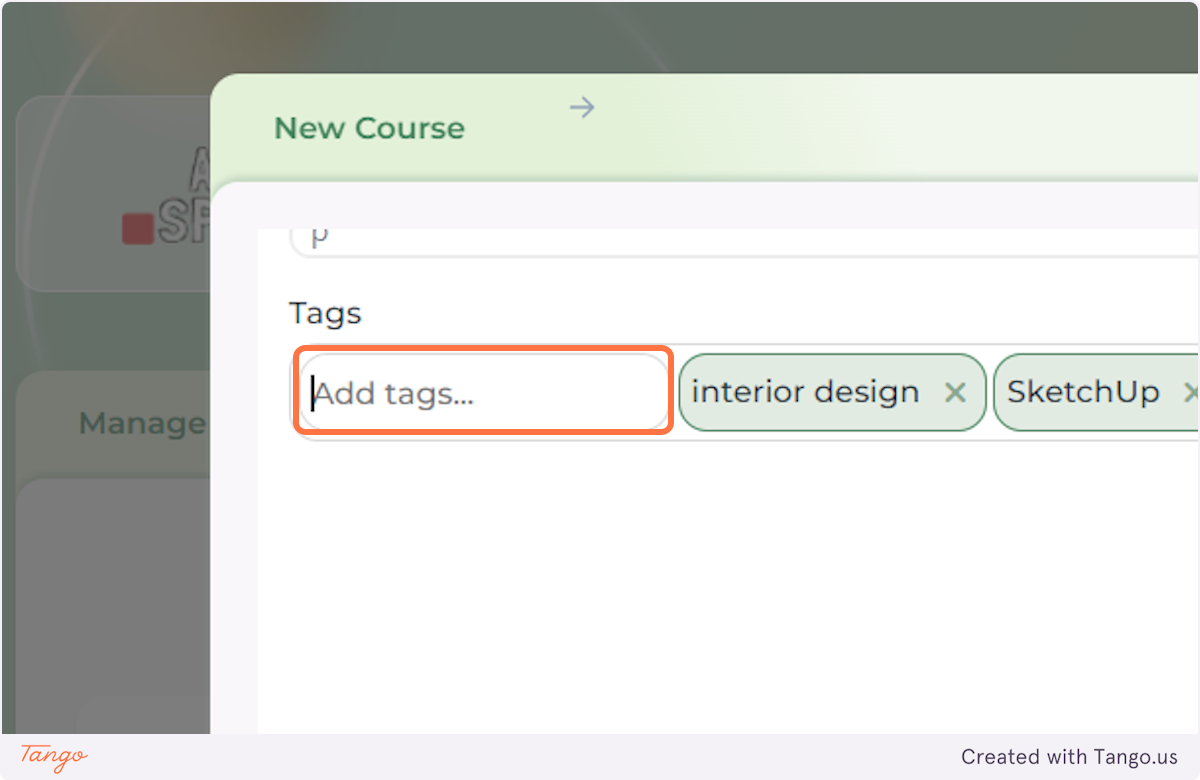
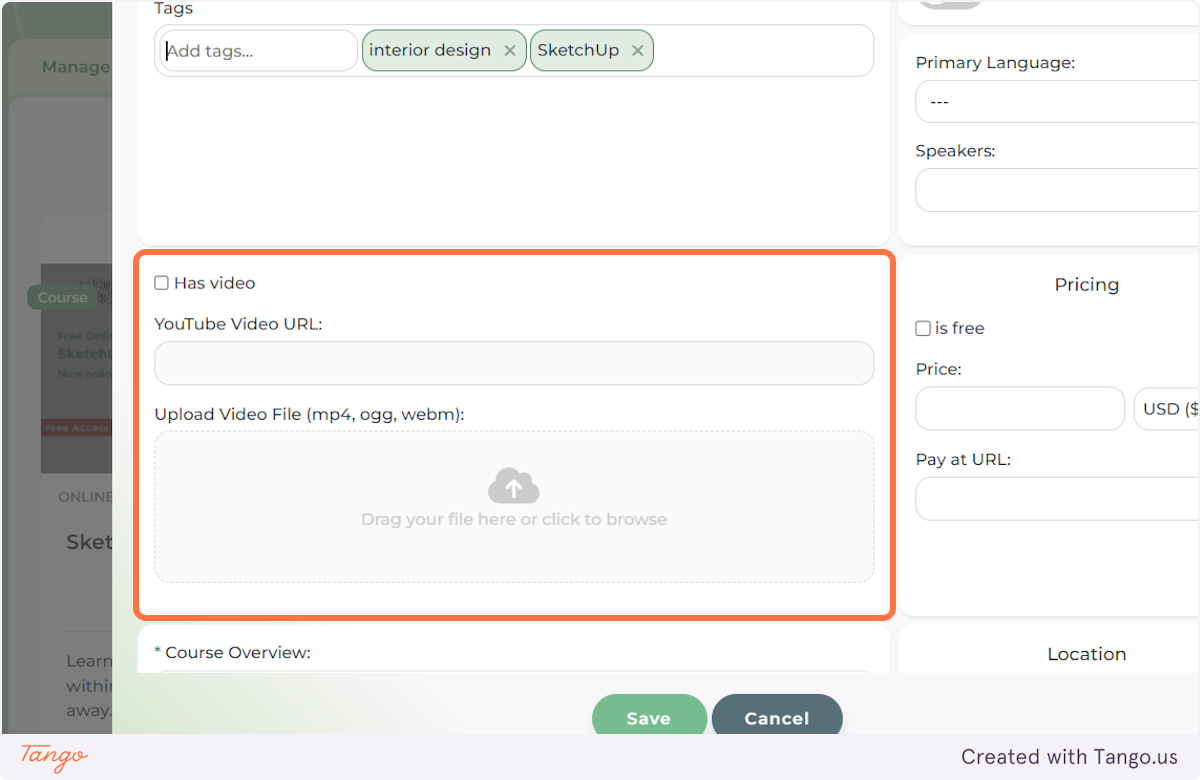
9. Optionally, add Tags and a Video to make your event's description more complete.
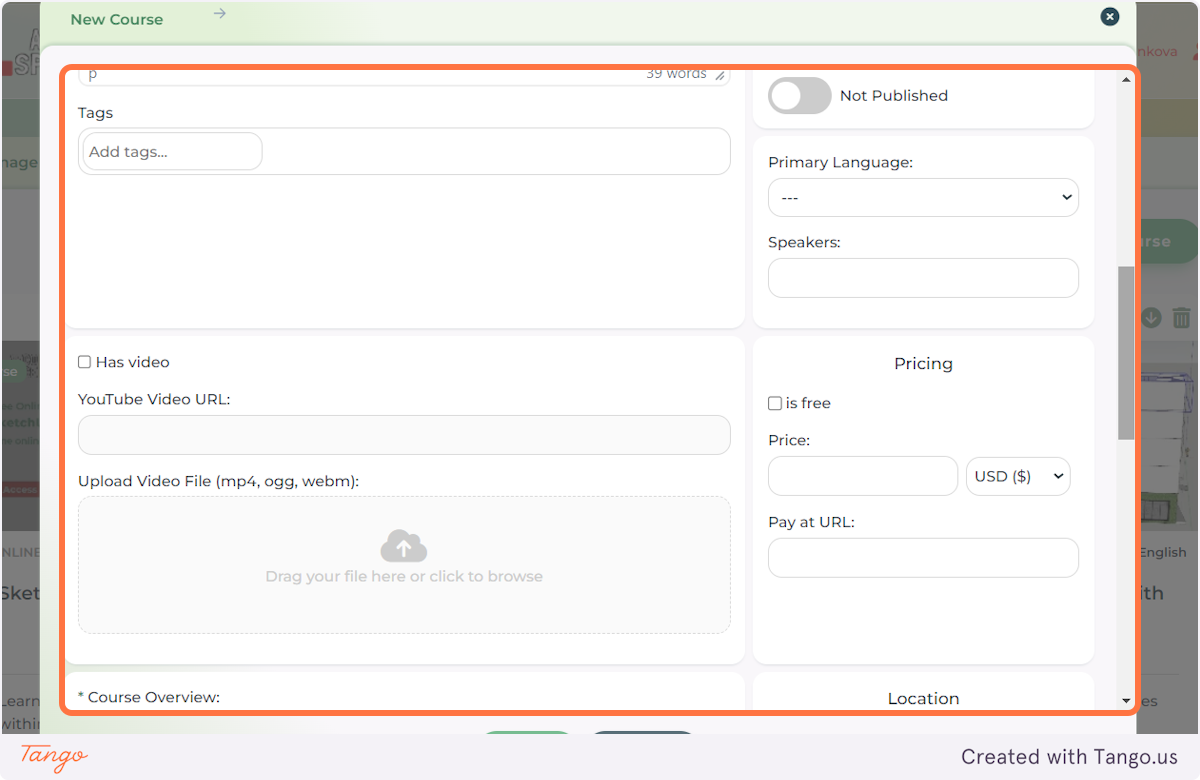
10. Type in the main keywords that describe your event in the Tags field. Press the Enter key after you are done typing each tag.
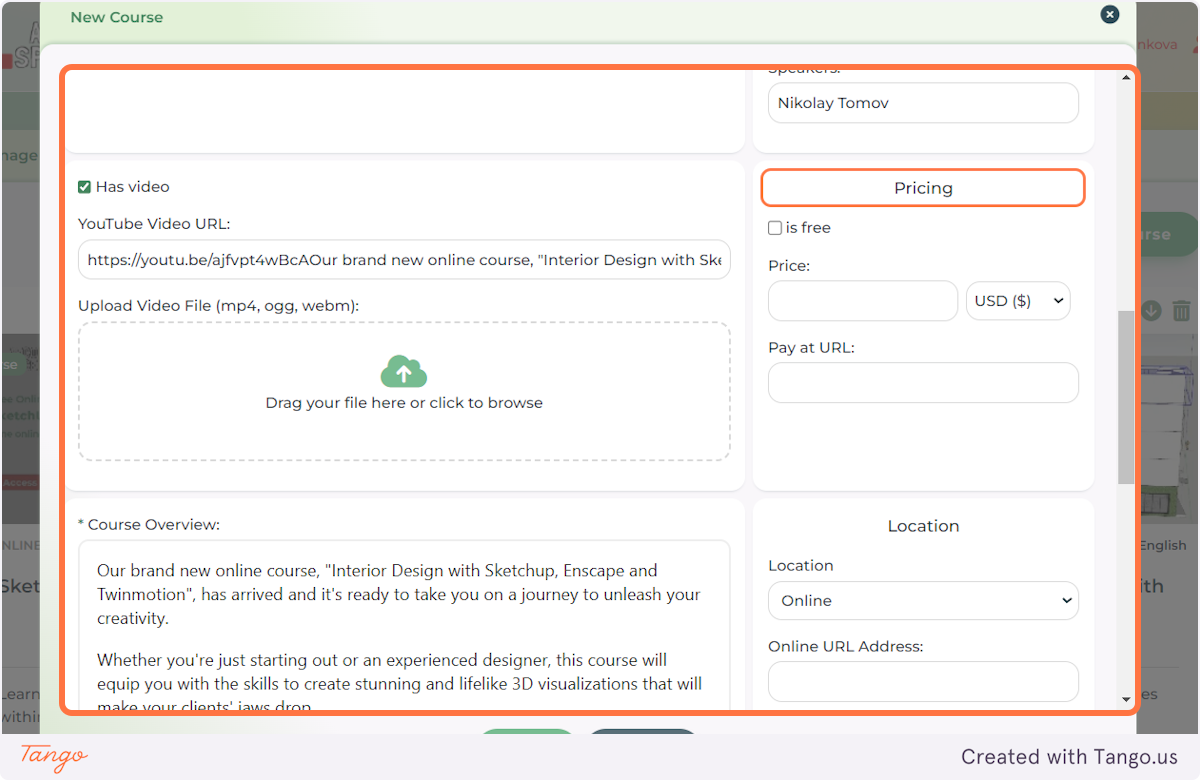
11. You can enter either a YouTube link or a upload a video file in the Has Video field.
12. Add a detailed event OVERVIEW including the event's aims, the event's expected outcomes, an agenda or a course curriculum. Use the ADDITIONAL INFORMATION field if you want to add speaker details or any other relevant info.
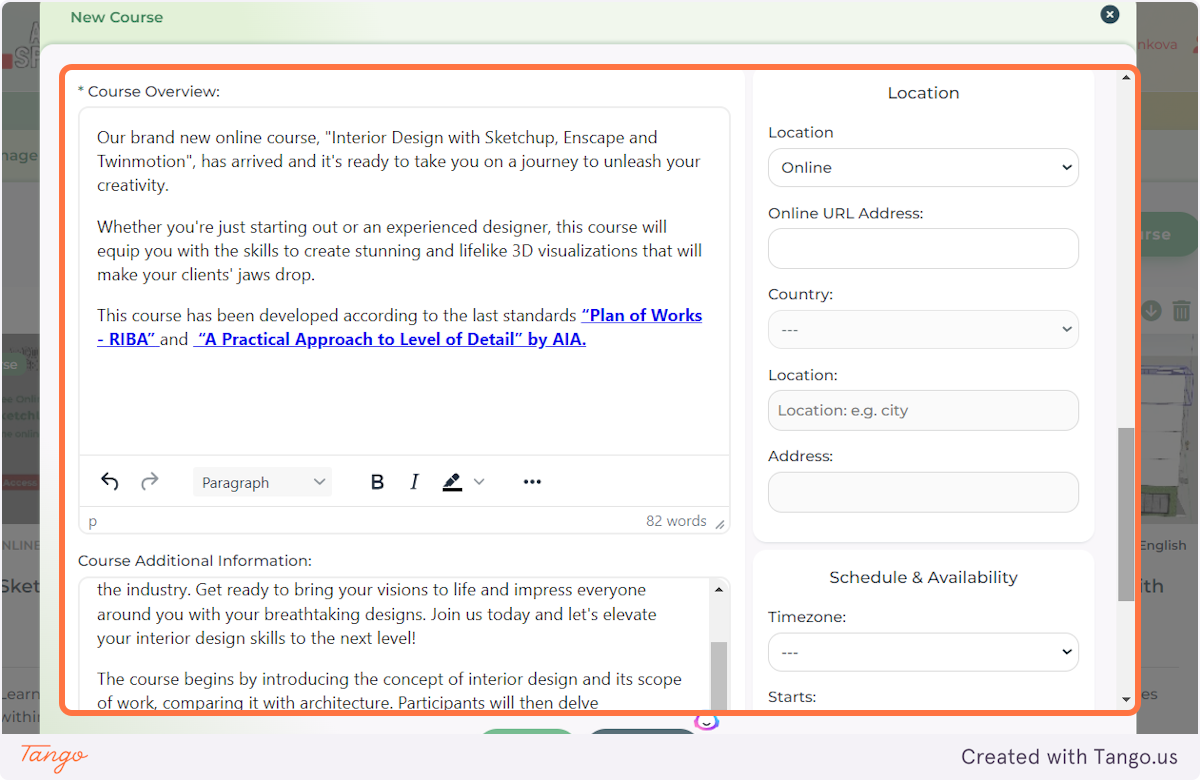
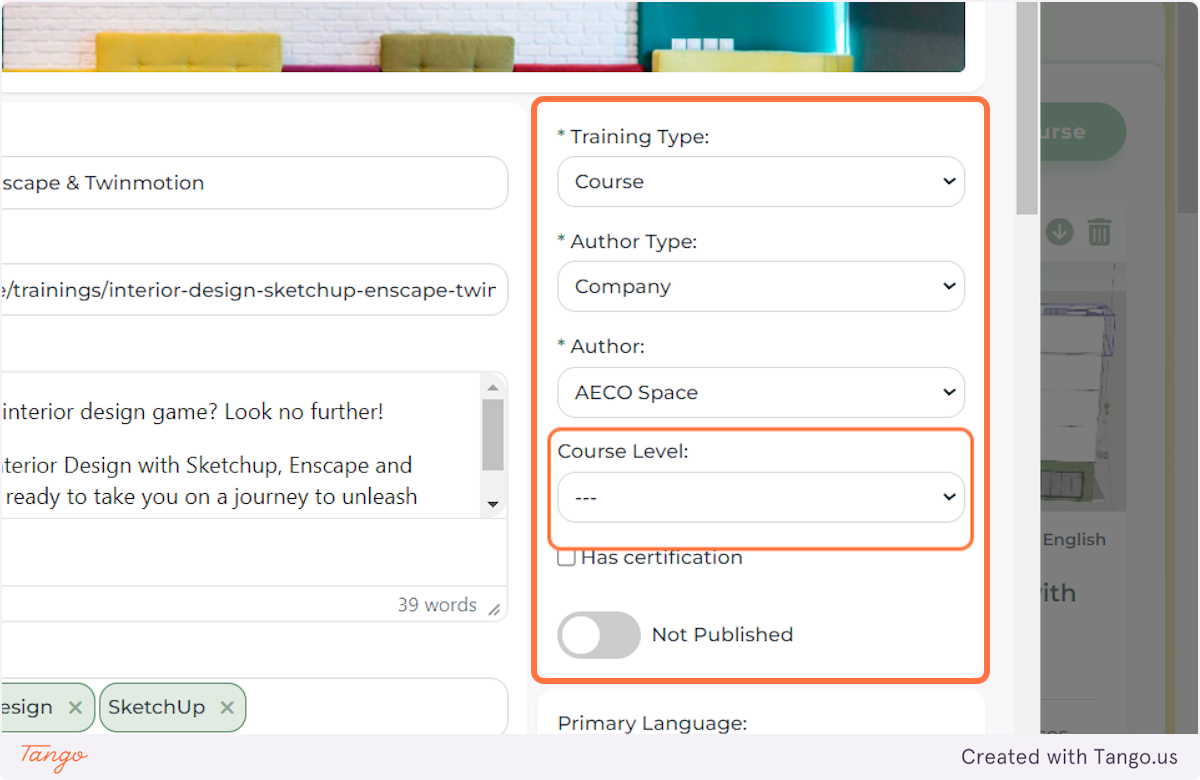
13. Next: move to the fields on the right side of the screen.
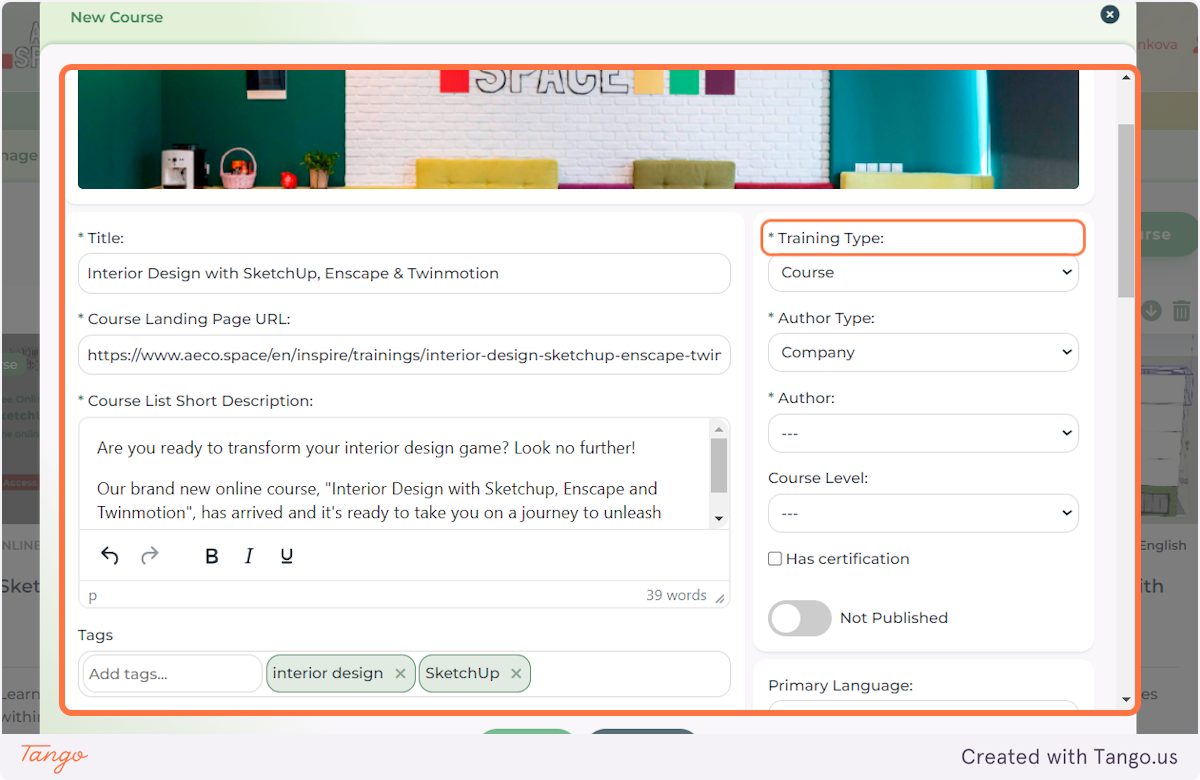
14. Fill in all the mandatory fields marked with an asterisk.
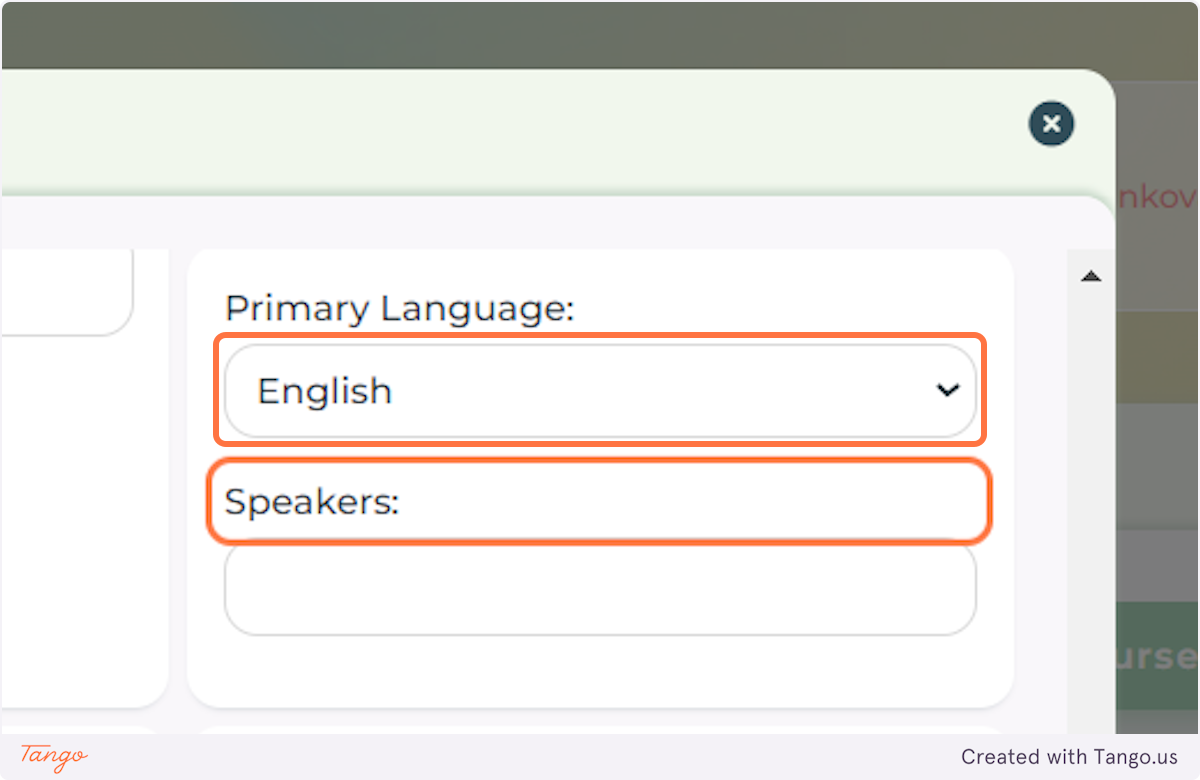
15. Select the Primary Language for your event and add the Speakers' names.
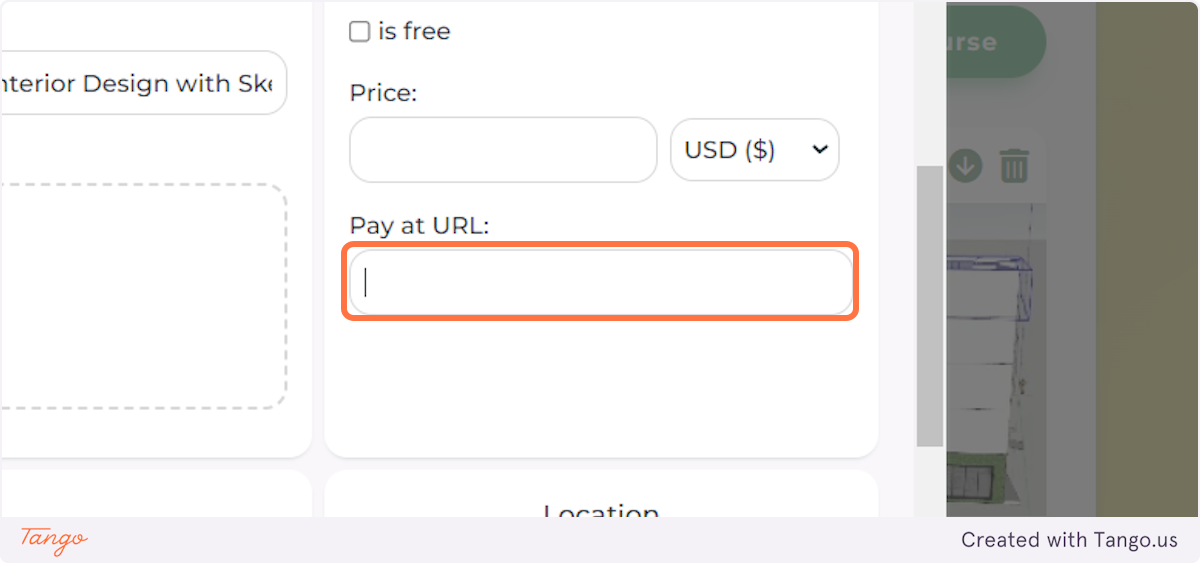
16. Move to the Pricing field where you can provide information whether the course is free or paid.
17. Add the URL where users can purchase your course or tickets to your event.
Please note that the AECO Space Platform doesn't host your courses and neither does it process payments on your behalf. It is just a platform for advertising your courses and events.
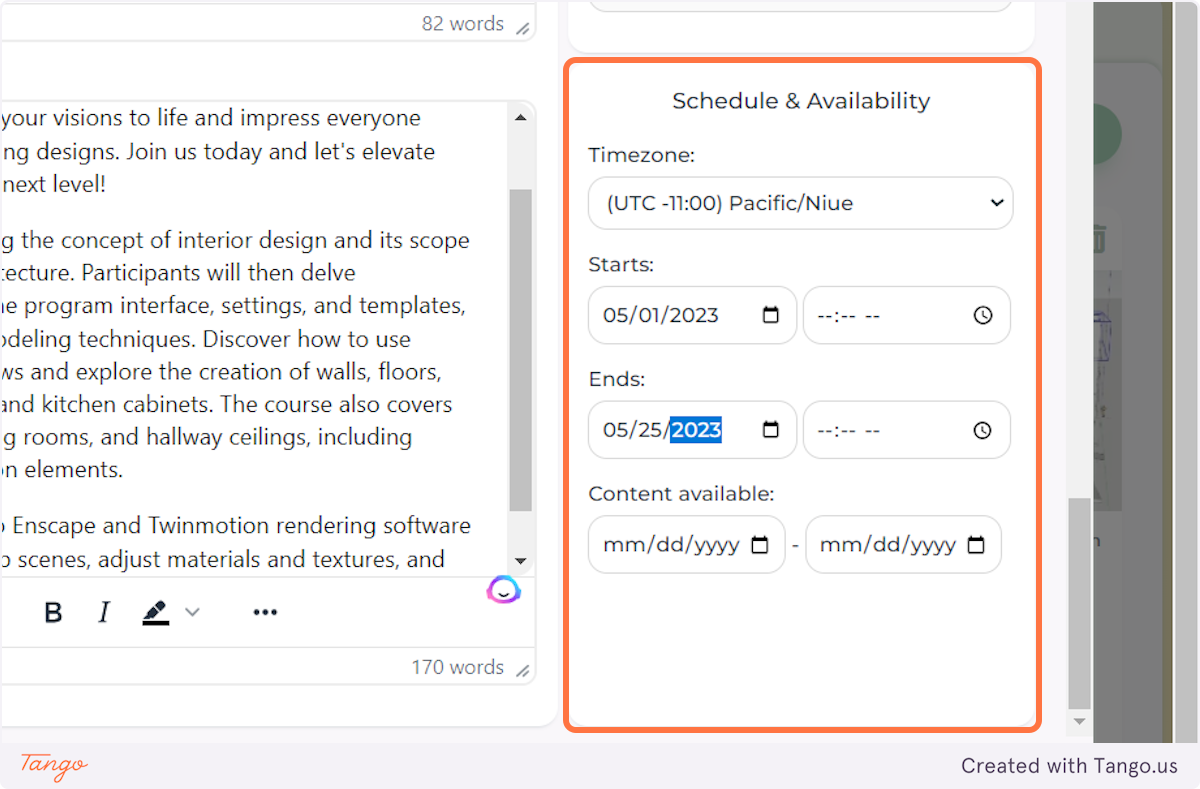
18. Optionally, select start and end dates for your event.
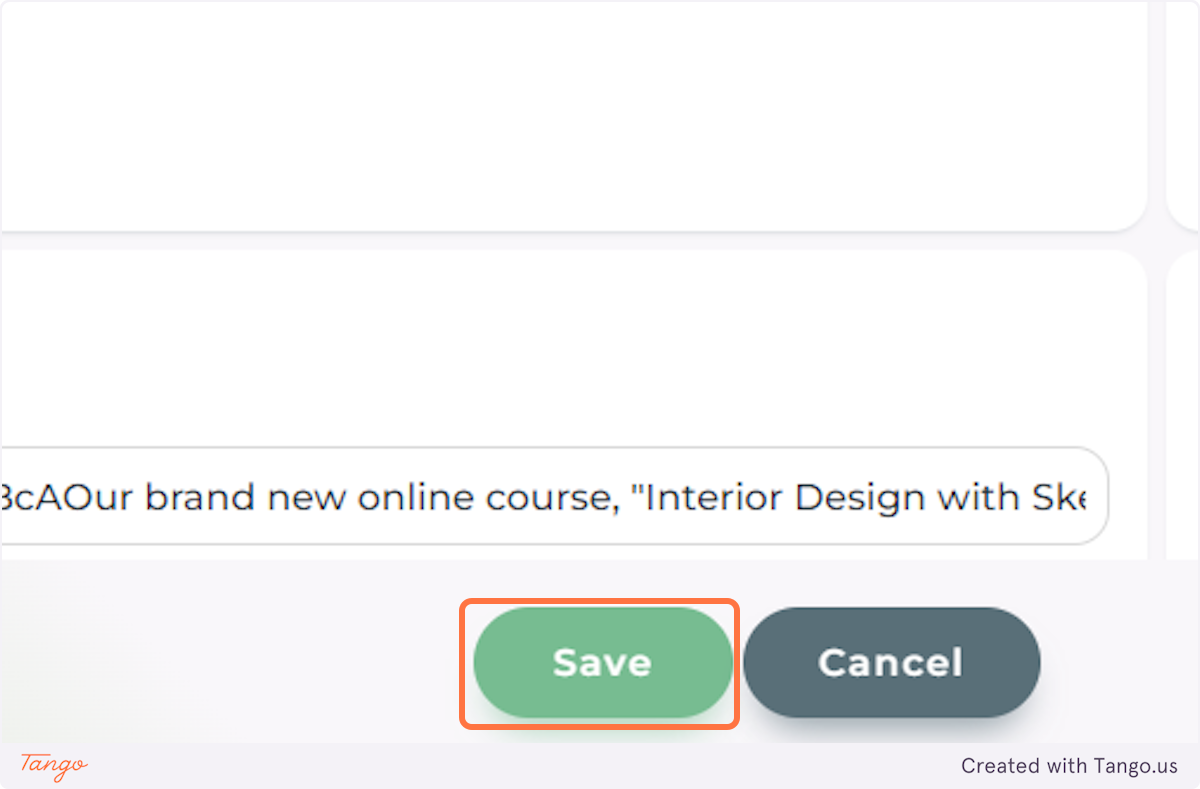
19. When you have finished adding all the details for your Event or Course, click SAVE to save a DRAFT version of it. This will save it to your account but only you can view and edit it.
20. Here's how your personal Events page looks like. Above each event or course there's a set of ICONS to help you manage and edit your event.
21. If you want to make your course visible in the Courses and Events public directory, make sure you've moved the Slider in your course description to PUBLISHED.
How to post an Event or a Course on AECO Space
You can use the capabilities of the AECO Space Platform to post not only job and project ads, but to also advertise your courses and events aimed at the AEC sector. Here are the steps you need to follow to publish an event.
1. Login to the AECO Space Platform
Go to https://aecospace.com/login and sign in with your profile. If you don't have a profile yet, you can easily create one through the Register link.
2. You will be automatically redirected to your home page dashboard.
3. Click on MANAGE COURSES & EVENTS at the bottom right corner of the page.
4. You will see your Personal Events Page where all your courses are hosted.
5. Click on Create Course.
6. You will be redirected to an Event Creation page.
7. Select a Cover Image for your event. This image will be displayed as a thumbnail on the Courses & Events Directory and as a cover image on your course landing page.
Files accepted: jpeg, png, gif up to 10 MB; width between 1200 px and 4032 px; height between 600 px and 4032 px.
Click on SAVE to save your work.
8. Next: add the main details of your Course or Event. The fields marked with an asterisk are mandatory.
The Course Short Description field should contain a brief description of the event that will be displayed on the Course Directory Page.
9. Optionally, add Tags and a Video to make your event's description more complete.
10. Type in the main keywords that describe your event in the Tags field. Press the Enter key after you are done typing each tag.
11. You can enter either a YouTube link or a upload a video file in the Has Video field.
12. Add a detailed event OVERVIEW including the event's aims, the event's expected outcomes, an agenda or a course curriculum. Use the ADDITIONAL INFORMATION field if you want to add speaker details or any other relevant info.
13. Next: move to the fields on the right side of the screen.
14. Fill in all the mandatory fields marked with an asterisk.
15. Select the Primary Language for your event and add the Speakers' names.
16. Move to the Pricing field where you can provide information whether the course is free or paid.
17. Add the URL where users can purchase your course or tickets to your event.
Please note that the AECO Space Platform doesn't host your courses and neither does it process payments on your behalf. It is just a platform for advertising your courses and events.
18. Optionally, select start and end dates for your event.
19. When you have finished adding all the details for your Event or Course, click SAVE to save a DRAFT version of it. This will save it to your account but only you can view and edit it.
20. Here's how your personal Events page looks like. Above each event or course there's a set of ICONS to help you manage and edit your event.
21. If you want to make your course visible in the Courses and Events public directory, make sure you've moved the Slider in your course description to PUBLISHED.
Join the Global Space for AEC Professionals
What you'll get: