How to get started, using Sketchup dynamic components
To generate a schedule, we’ll start by adding a few attributes to the door and window components in my model. Specifically, we’ll add a Size using the new Advanced Attributes (access these through the “More” button in the Entity Info window). In addition to Size, there is a new attribute for Price, URL, Owner, and Status. These fields allow you to add information to any component, and they can also be called upon by LayOut labels (we’ll look at those a few paragraphs on)!
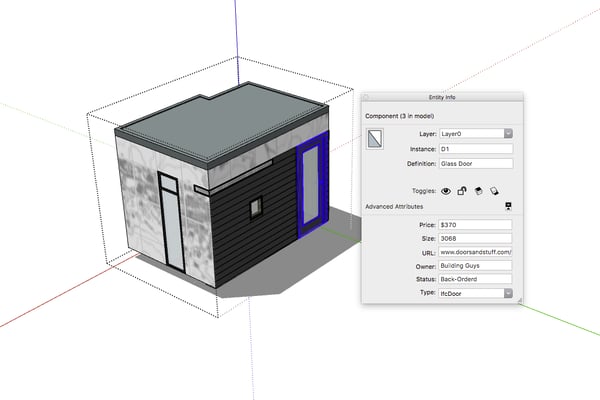
These attributes can be used to add data to components without creating Dynamic Components.
In addition to defining a Size for all components, we also want to make sure all components have an instance name. Instance Names are also defined in the Entity Info window, and are the data object we’ll use to create an aggregated schedule for our doors and windows.
In most cases, all instances of a door or window will have the same Instance Name, but in some cases (such as a door which can swing either left or right) a single component may end up having more than one Instance Name. In this example, we had one door component. Two of these doors swung left and were labeled D1. The third, a right swing, was labeled D2. Same component, but different real world thing: each real world thing should have a unique Instance Name!
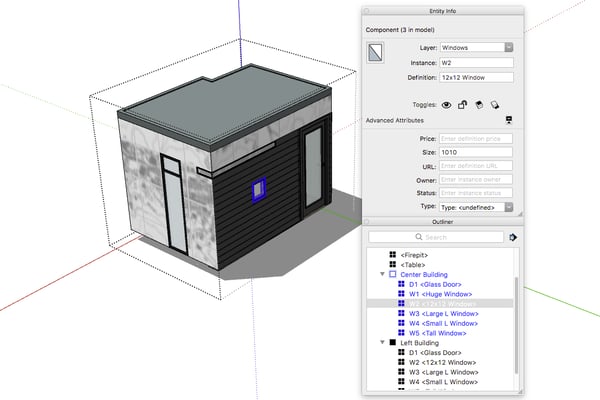
The Instance Names will populate the labels once the model is in LayOut
Once the data is all set in the model, it’s time to run a report! In Generate Report, we’ll create a brand new template. Make sure to give your new template a name and save it (The guy who made the video below forgot this important step!).
The first step in creating the new report is to choose where the information will come from. In this example, we want to report upon the entire model and choose to report upon a specific nesting level. In this case, Level 3.
“What the heck is a nesting level?” you ask? Level 1 is the model, Level 2 is the buildings and loose components. Level 3 is the door and window components inside the buildings.
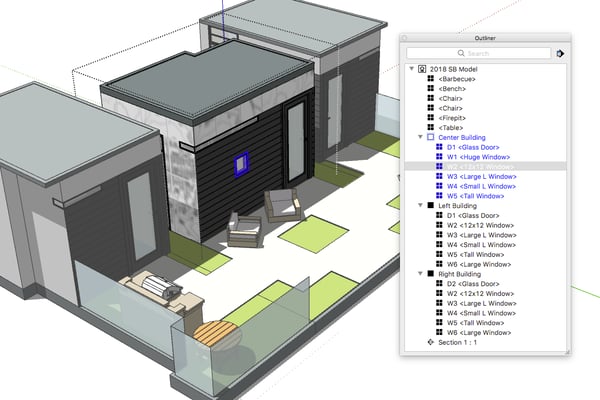
Now, we’ll set the Group By value. This is the attribute by which Generate Report will aggregate components. In this case, we want all components with the same name to get consolidated together, so we will drag Instance Name into the Group By field. Finally, we can add any additional attributes that we would want on the schedule. In this example, we’ll add Quantity and Size to the Report Attributes list.
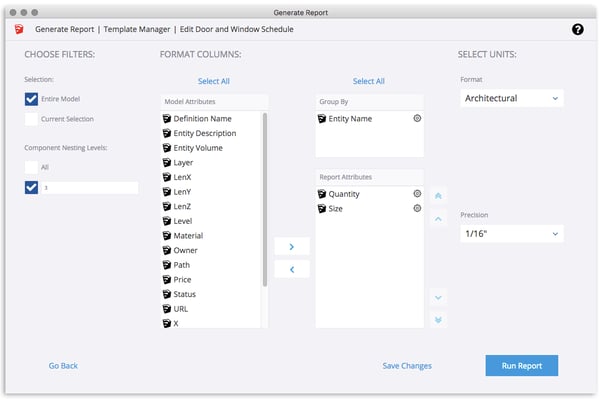
Saving a template allows you to run the same report on other jobs in the future.
Now we’ll Save and run the report. Once I run the report, it looks like a door and window schedule. Success! The final step in SketchUp is to export the report, so that we can load a .CSV into LayOut as a Table.
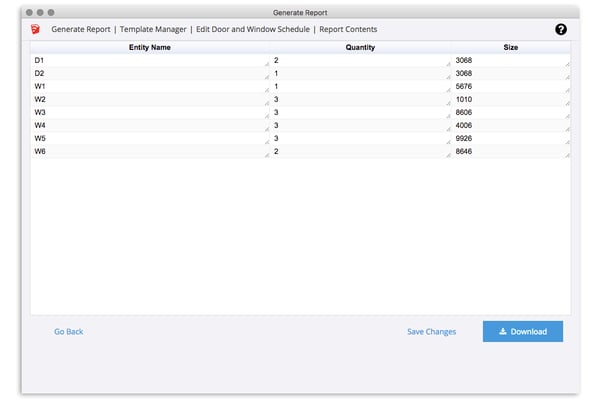
All the data you want, and nothing you don’t need!
Finishing up in LayOut
Over in LayOut, the report comes in as a Table, which means it can be edited and styled (so we can change the column heading from Instance Name to Label). Even better, we can use the Label tool to add call-outs to the Model Window for the Instance Name of each door and window. Since the Instance Name was a standard attribute from SketchUp, we’ll simply choose it as an automatic label from the label dropdown (we could also use the Size or Component Name, if we wanted).
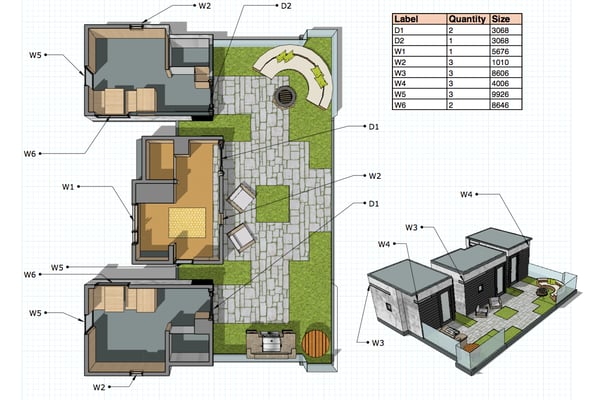
It’s just that simple!
There you have it: A little bit of pre-work in naming and organizing components while modeling, and then you’re off to the races when it’s time to turn your model into a project. Happy sketching!