SketchUp
Common mistakes that architects make when starting a project
Today, we will present to you the ways to do your projects really incredible with amazing textures and materials.
Today, we will present to you the ways to do your projects with really incredible amazing renderings.
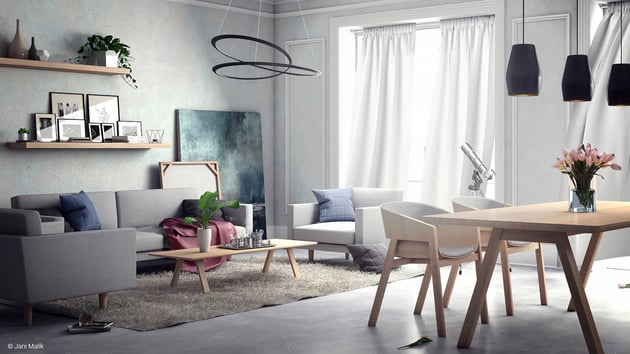
Image: ©Jani Malik
Renderings are a crucial part of practically every architectural project nowadays. They help us to not only impress our clients but also communicate our ideas properly. While some architects and designers prefer to outsource them, others do renderings themselves. If you are feeling overwhelmed by this kind of work, let’s take a look at how V-Ray for SketchUp could make that easier for you.
Finding time for proper architectural renderings while doing all of the other tasks as an architect at the studio could be hard.
Sometimes it is also a matter of skill and patience, that only a few of us possess. But this type of work could also be costly to outsource, especially if you are a young, emerging studio and you work on smaller-scale projects.
We will take a look at the important steps that help you in the process and give you brief guidance on how to work with V-Ray for SketchUp.
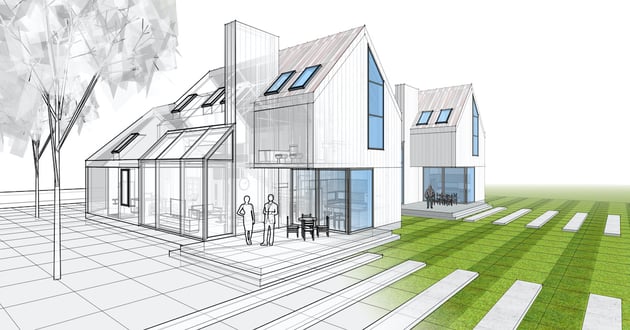
A simplified rendering, more suitable for competition design | Image: Masterclass
Are you aiming for a more photorealistic rendering, or do you prefer making a simple, stylized look, or even a collage? That decision usually depends on the type of project you are working on. If you are entering an architecture or design competition, you should probably strive to be more creative and opt for more informative, rather than photorealistic views.
It is often the case that you are going to make renderings for clients, that aren’t very familiar with the architecture. This means you will have to be able to fully present your design with a finished look that will impress them and help them understand and see the result of their investment.
A photorealistic rendering in the making | Image: Toolfarm

The finished picture | Image: Bartlomiej Ordon @ be3d.studio
First, you need to do a draft of the view or views that you are going to render. You can do a simple hand sketch that will guide you in setting the perfect angle and choosing details like greenery or small accents. When positioning the physical camera keep in mind the aspect ratio that you will need for the final output.
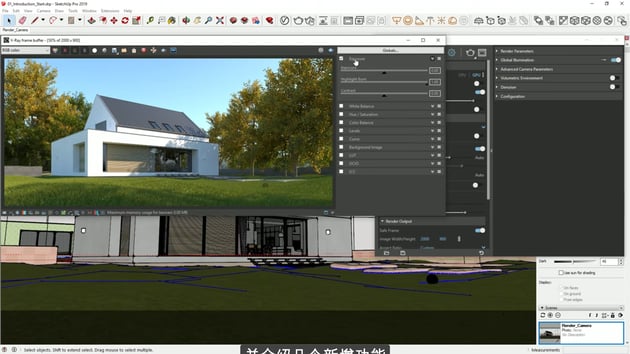
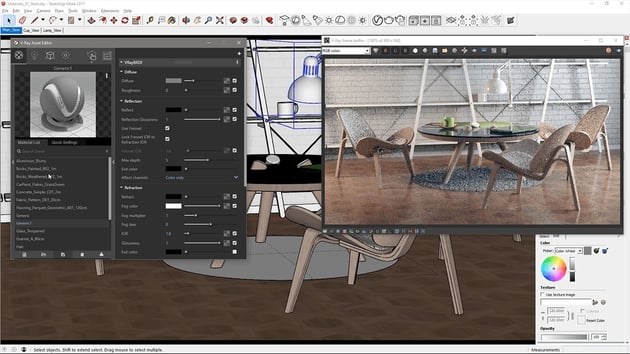
The most important tool in V-Ray for SketchUp is the Asset Editor. It will help you with all the needed rendering settings. One of the best qualities of the V-Ray for SketchUp component is that you are able to edit your model directly in your SketchUp file and see the results immediately with the help of interactive rendering.
Adjusting light is made simple with SketchUp’s shadow tool. Here it comes in handy if you have positioned your model according to the real-life North cardinal direction. This way you also get realistic shading for an exact time of the year.
 You can follow V-Ray’s tutorial for this rendering here
Adding material to the scene is made easy with the in-built library of over 500 ready-to-use materials. When you start with that part of your scene, you can make a small test render window, so that you can see the results faster. To be able to adjust the patterns properly with the SketchUp material tool, you would need to use only defined (opposed to infinite) surfaces. For achieving more optimal results, you can also mix different textures.
V-Ray for SketchUp is also useful for interior and product design renderings | Image: Chaos Group
Scene elements like trees, plants, or other multiplied parts should be placed into the model as proxies. This way the scene runs faster and keeps a reasonable file size. You can set up the trees’ shapes and materials from the source proxy file. Adding more depth to the scene comes with the atmospheric effect in the Asset Editor. It’s an effect similar to fog and haze and it gives the real-life color fading and blending of aerial perspective.
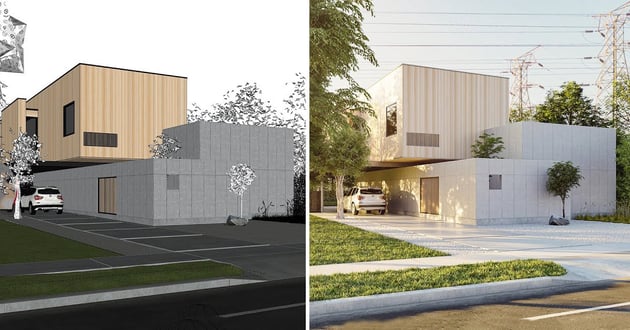
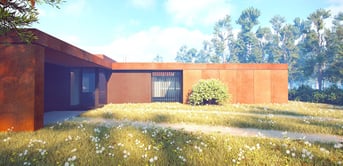
Before and after rendering
When choosing the format for your output file, you should keep in mind which one provides better quality and less picture artifacts. As opposed to the often-used JPEG format, EXR or PNG will be more helpful if you wish to further edit the picture with an external image editor. You can choose to save different render elements like reflection, lighting, atmospheric, specular, refraction, and global illumination. When you are ready to click the button for the final rendering, you can also choose to use the V-Ray cloud, so that you can continue your other work on the device.
Now you have the first simple steps to start your own exquisite renderings with V-Ray for SketchUp. One of the most flexible aspects of this combination of programs is that you can also use a huge number of free tutorials online if you wish to learn more. So, why not give it a go?
This content fits within our SketchUp & Design Software Tutorials, focusing on accessible rendering workflows that support design storytelling without overproduction.
Today, we will present to you the ways to do your projects really incredible with amazing textures and materials.
Access millions of free models using 3D Warehouse. Instantly add entourage and context to your project with free models from the world’s largest 3D...
Read about the functionality of SketchUp Pro - how easily you can make your 3D model and make details in Layout.